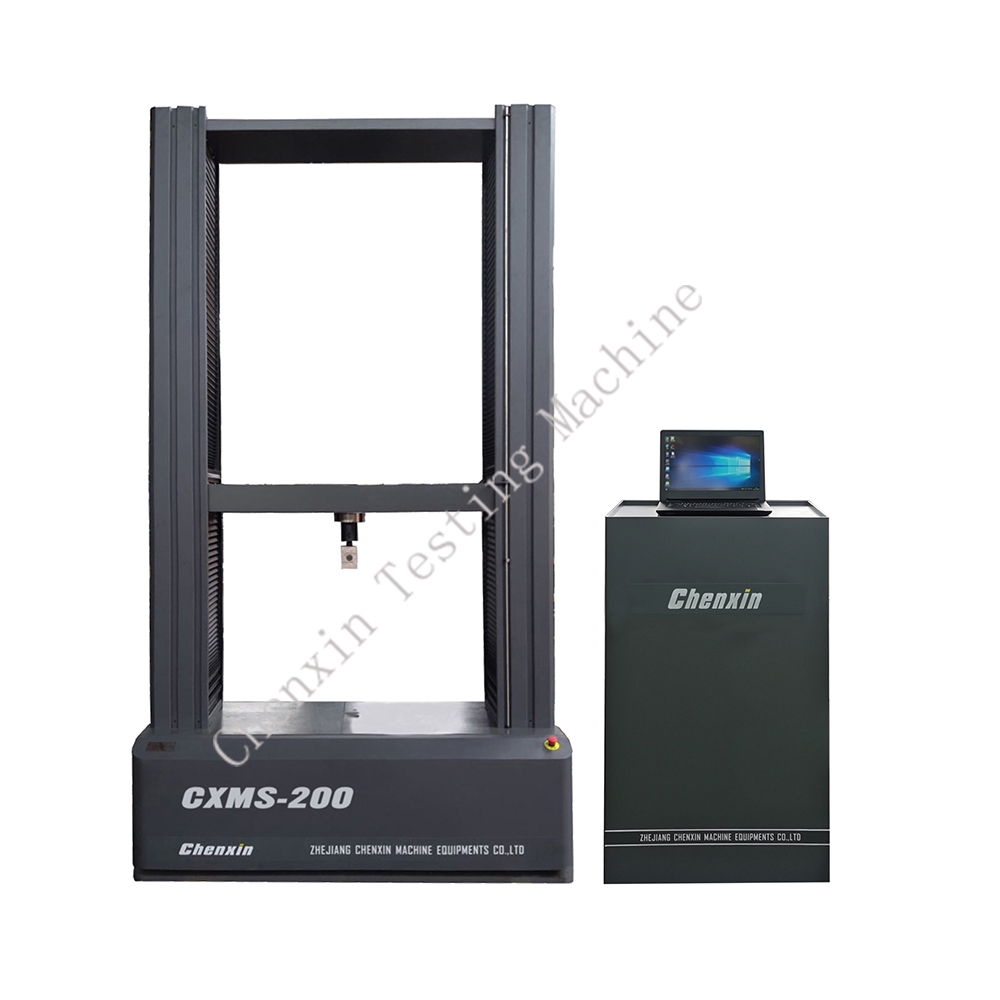
CXMS-200 gantry scaffold testing machine
Main purpose:
The testing machine is mainly used for strength test of upper bowl buckle, welding strength test of lower bowl buckle, strength test of cross bar joint, welding strength test of cross bar joint and compressive strength test of adjustable support; Sliding resistance test, damage resistance test, torsional stiffness test, tensile performance test of butt fastener and compressive performance test of base; Gantry test, vertical pole compression test, cross bar vertical deflection test, gantry lock pin test, horizontal frame and scaffold board test, bending and vertical deflection test, baffle anti detachment test, cross support compression test, connecting rod tensile test, lock arm tensile strength and elongation deformation test, and adjustable base compression test; One side shear strength test, two side shear strength test, bending strength test, tensile test, shear strength test of inner circumferential weld of connecting plate, compressive strength test of adjustable support and adjustable base.
Product features:
1. Portal prestressed frame is adopted, with high axial stiffness;
2. The arc synchronous pulley is adopted for deceleration, and the ball screw pair is used for transmission, so that there is no gap in the transmission, so as to ensure the precise control of the test force and deformation speed;
3. In addition to the ball screw guide, the guide rod also guides the moving beam. The special double guide structure greatly improves the stiffness to 2 × Above 108n / m, and overcomes the swing of the moving beam.
4. The single space structure is adopted, and the tension, compression and bending tests are carried out in the lower space, which is convenient for operation.
5. Stable transmission, fast response and low noise [below 60dB (a)];
6. The servo unit adopts full digital AC servo motor and driver, with wide speed regulation range and high precision;
7. The measurement control system is operated online with the computer;
8. Mobile control box is convenient for moving beam adjustment; It has various control functions such as fast / slow and stepping, which is convenient for fast and accurate adjustment of moving beam position;
9. The resolution of force measurement and deformation measurement is high, and there is no grading inside and outside. The resolution of the whole process remains unchanged. Users can set it by themselves according to the test needs;
10. The force measuring sensor adopts high-quality domestic brand, with high precision and good stability for a long time;
11. The open data connection interface can realize the closed-loop control of load, deformation, displacement and speed, and control the constant load, constant deformation, constant displacement, uniform stress rate, uniform strain rate and constant speed in a multi-step manner. There is no impact conversion between the latter three modes during the test;
12. With overload, overtravel, overvoltage, overcurrent, overheating and other protection functions;
13. Different test schemes can be set according to different test requirements. Curve type, calculation unit, calculation accuracy, displayed information and test conditions can be set in the test scheme in advance. Users only need to select different test schemes to obtain the required information and simplify the operation;
14. Stress-strain, force time, force displacement, force deformation, displacement time, deformation time and other curves can be selected; And timely switch during the test, and automatically adjust the coordinates during the test to ensure that the curve is intuitive and complete;
15. It can collect the test data in real time, draw the curve, locally enlarge or reduce the curve, and print the test curve;
16. The display curve is continuous, smooth, with appropriate thickness, curve coordinates and clear coordinate marks;
17. Superposition and comparison of test curves in the same group;
18. The test results can be accessed arbitrarily and the curve can be reanalyzed; Including data recalculation, curve reproduction, etc;
19. The original test data and test results can be output to excel and the report can be printed for the convenience of users;
20. Set the control parameters to realize the automatic operation of the program;
21. The software package is designed according to the standards provided by the user (such as GB, ISO, DIN, astmd, JISK, etc.), which can not only support the functions proposed above, but also provide various complex data processing functions and special control functions.
Technical parameters:

